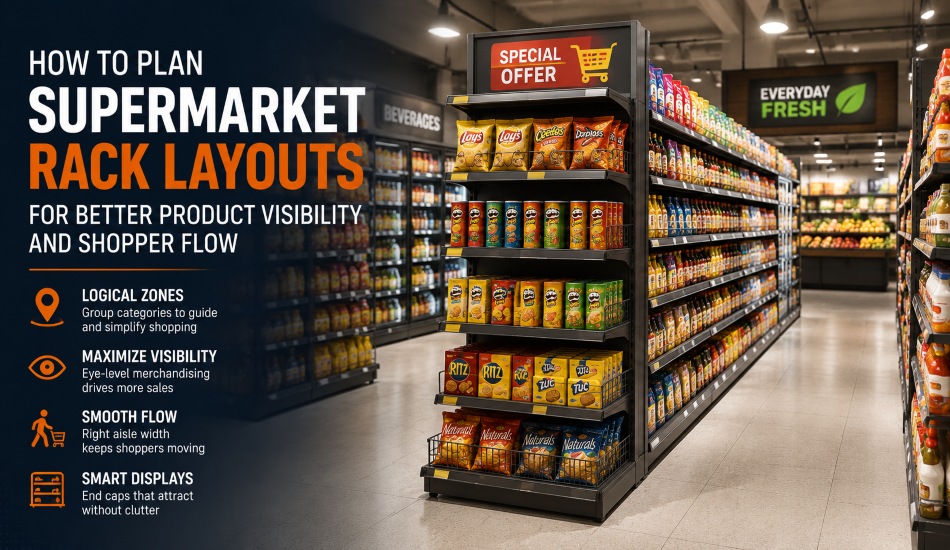
How to Plan Supermarket Rack Layouts for Better Product Visibility and Shopper Flow

super market rack layout

Walk into any well-run supermarket and you will notice something before you notice the products: the layout just works. Shoppers move through the aisles without hesitation, key items catch the eye at the right moments, and nothing feels crowded or confusing. That result is rarely accidental. It comes from a rack layout that has been planned around how people actually shop, not just how much stock needs to fit on the floor.

The way you arrange your supermarket racks affects far more than tidiness. It shapes how long shoppers stay in the store, which products they notice, how easily they find what they came for, and ultimately how much they spend. A poorly planned layout creates bottlenecks, hides high-margin products, and pushes customers to leave faster than they should. A well-planned one guides shoppers naturally past the items you most want them to see.

This guide walks through the practical decisions behind a strong supermarket rack layout, from choosing between wall units and aisle units to setting the right aisle width and using end displays without cluttering the store.

Wall Units vs Aisle Units

Every supermarket layout is built on two basic shelving choices: wall shelving along the perimeter and gondola racks running through the floor.

Wall shelving is fixed to the walls and makes efficient use of vertical space. It is generally more affordable to install, keeps the floor area open, and works well for organizing perimeter stock such as beverages, dairy cases, or bakery displays. Because it runs along a fixed boundary, it also helps frame the shape of the store and gives shoppers a clear sense of where the space begins and ends.

Gondola racks, by contrast, stand freely in the middle of the store. Most are double-sided, meaning products face outward on both sides of the unit. This is what creates the classic supermarket aisle, with shelving on either side and a walkway down the middle. Gondola shelving is the more flexible option. Units can be moved, reconfigured, and adjusted in height without construction work, which makes it easier to update planograms, run seasonal promotions, or respond to changing product mixes.

Most supermarkets use a combination of both. Wall shelving anchors the perimeter, while gondola racks form a grid of aisles in the center of the floor. Larger stores tend to lean more heavily on gondola grids to maximize the amount of product displayed per square meter, while smaller stores often rely more on wall shelving to keep costs down and preserve open floor space.

How to Create Logical Product Zones

Before placing a single rack, decide how the store will be divided into zones. Shoppers do not think in terms of individual products; they think in categories. Grouping related items together, such as breakfast foods, cleaning supplies, or personal care, reduces the mental effort needed to shop and keeps people moving with purpose rather than wandering.

A few principles make zoning more effective:

  • Start with high-frequency categories near the entrance. Staples that most shoppers buy, such as fresh produce or bread, are often placed early in the path to draw people into the store and set a positive first impression.
  • Place complementary categories next to each other. Positioning items that are often bought together, such as pasta and sauce, or chips and dips, encourages larger basket sizes.
  • Keep planned purchases and impulse purchases separate but connected. Necessities pull shoppers through the store, while snacks, drinks, and seasonal items placed along that route capture additional spending.
  • Maintain consistency between visits. Once a zoning plan is set, avoid moving major categories too often. Shoppers build a mental map of the store, and constant changes create frustration rather than discovery.

Zoning is essentially the floor plan of your entire store strategy. Everything else, including eye-level placement and end displays, works within the zones you define first.

Eye-Level Merchandising and Sightlines

Shelf height has a direct effect on what shoppers see and buy. On a standard gondola rack, the middle shelves at eye level receive the most attention with the least effort, which is why they are often called the “eye level is buy level” shelves. Lower shelves require shoppers to bend down and typically hold bulkier or heavier items such as large packs or bottled goods. Upper shelves require reaching and are better suited to slower-moving or overstock items.

When planning shelf placement, keep these points in mind:

  • Reserve eye-level and just-below-eye-level shelves for your most profitable items, new products, or items you want to promote.
  • Place children’s products slightly lower, at a height children can see and reach, if that category is relevant to your store.
  • Use shallower shelves near the top for lighter, smaller items and deeper shelves at the base for heavier goods, which also improves stability and safety.
  • Avoid overloading shelves to the point where individual products get lost. A shelf that is too full is just as hard to shop as one that is empty.

Sightlines matter just as much as shelf height. Shoppers should be able to see clearly down an aisle and, ideally, catch glimpses of key categories or signage from a distance. Racks that are too tall in the wrong location can block sightlines and make a store feel closed in, while racks that are appropriately scaled help shoppers orient themselves quickly. As a general rule, taller gondola runs work best deeper inside the store where shoppers are already browsing, while lower units near entrances and checkout areas keep the space feeling open and easy to scan.

Aisle Width and Shopper Flow Basics

Aisle width is one of the most overlooked factors in supermarket layout, yet it has a direct impact on comfort, safety, and sales. Aisles that are too narrow cause congestion, make it hard to pass other shoppers or trolleys, and can push people to leave a section before they have finished browsing. Aisles that are unnecessarily wide waste valuable floor space that could otherwise hold product.

A commonly used starting point is around 48 inches (roughly 1.2 meters) for a standard aisle, which allows two shopping trolleys to pass comfortably. Main walkways and accessibility routes generally need to be wider to accommodate wheelchairs, trolleys, and higher foot traffic, while secondary aisles in smaller sections can be slightly narrower without disrupting flow.

Beyond raw measurements, think about the overall traffic pattern of the store:

  • Avoid dead ends. Aisles that lead nowhere frustrate shoppers and discourage full-store browsing.
  • Create a clear main path. Many supermarkets use a loop or racetrack-style layout, where a wide central aisle guides shoppers past the perimeter of the store before directing them into the interior aisles.
  • Keep high-traffic intersections open. Points where multiple aisles meet, such as near the entrance or checkout, should have extra clearance to prevent bottlenecks.
  • Test the layout by walking it yourself. Push a trolley through the planned aisles before finalizing the design. Problems that are invisible on paper often become obvious in practice.

Good flow does not mean rushing shoppers through the store. It means removing friction so they can move at their own pace and give their attention to the products, not the layout.

Using End Displays Without Clutter

End caps, the displays at the end of a gondola run, are some of the highest-visibility spots in the entire store. Because they sit at the intersection of two aisles, they catch the eye from multiple directions and are ideal for promotions, seasonal items, or new product launches.

Their visibility is exactly why they need to be used carefully. An end display that is overstuffed or poorly organized undermines its own purpose and can make the surrounding aisle feel cluttered rather than inviting. A few guidelines help keep end caps effective:

  • Feature one clear theme per end cap. Mixing too many unrelated products dilutes the message and makes the display harder to read at a glance.
  • Rotate displays regularly. Refreshing end caps for new promotions or seasons keeps regular shoppers engaged and gives them a reason to look twice.
  • Leave breathing room. A display with clear spacing and visible signage performs better than one packed to the edges.
  • Use signage that is readable from a distance. Shoppers often decide whether to stop based on what they can see from several meters away, not up close.

Used well, end displays act as punctuation marks throughout the store, breaking up long aisle runs and giving shoppers natural points to pause, notice something new, and add it to their basket.

Layout Tips for Minimarts vs Larger Supermarkets

Not every store has the same amount of space to work with, and layout strategy should scale accordingly.

For minimarts and smaller supermarkets:

  • Rely more heavily on wall shelving around the perimeter to keep the center floor open and reduce the feeling of a cramped space.
  • Use two or three gondola runs in the central area rather than a full grid, focused on the highest-turnover categories.
  • Choose shorter gondola heights, generally in the 48 to 54 inch range, so sightlines remain open across the whole store and staff can see the entire floor from one position.
  • Prioritize flexibility. Smaller stores often need to adjust their category mix more frequently, so modular gondola shelving that can be reconfigured without major disruption is especially valuable.

For larger supermarkets:

  • Use a full grid of gondola racks as the primary structure, with wall shelving reserved for supplementary categories along the perimeter, such as chilled or frozen goods.
  • Take advantage of taller gondola units, often up to 72 inches, in the deeper sections of the store where shoppers are already engaged and browsing by category.
  • Plan for wider main aisles and clear racetrack-style circulation, since larger stores see heavier and more varied foot traffic, including trolleys, baskets, and higher shopper volumes at once.
  • Build in more end caps and secondary display points along the extended aisle runs to maintain interest across a larger footprint.

In both cases, the underlying principle is the same. The layout should match the realistic traffic patterns and product range of the store, not a generic template borrowed from a much larger or smaller format.

Bringing the Layout Together

A supermarket rack layout is never just about fitting product on shelves. It is a plan for how customers experience the store from the moment they walk in to the moment they reach the checkout. Getting the wall-to-gondola balance right, zoning categories logically, merchandising at eye level, sizing aisles for comfortable flow, and using end displays with restraint all work together to create a store that feels easy to shop and encourages customers to see more of what you offer.

Getting these details right starts with the shelving system itself. A durable, adjustable gondola rack gives you the flexibility to build the layout your store actually needs, and to change it as your product range and customer flow evolve.

Explore our full range of gondola rack solutions and find the right configuration for your supermarket or minimart layout.

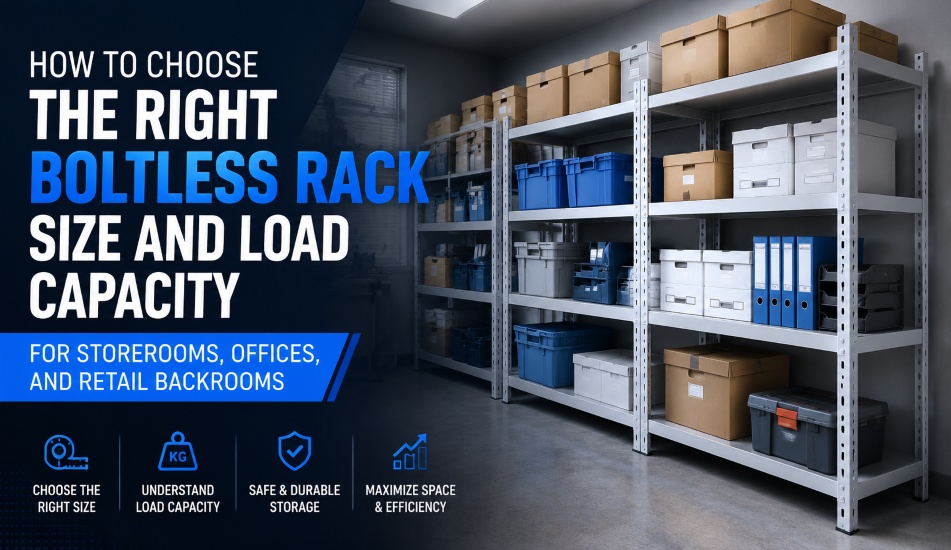
How to Choose the Right Boltless Rack Size and Load Capacity for Storerooms, Offices, and Retail Backrooms

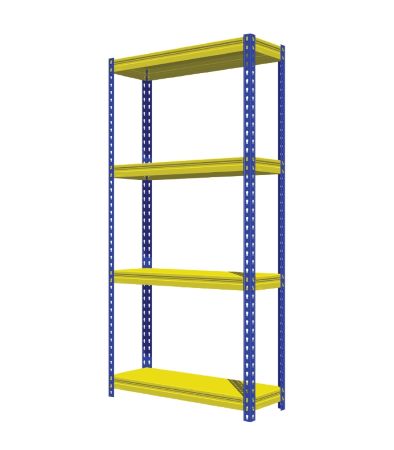
Boltless Rack Size and Load Capacity

It is tempting to treat boltless racks as a one size fits all purchase. They look simple, assemble without tools, and often look much like one another in a catalogue. But storerooms, offices, and retail backrooms each place very different demands on a rack, and a size or load rating that works well in one setting can be the wrong choice in another.

Buying based on price or appearance alone often leads to racks that sag under normal use, shelves that are too shallow or too deep for what you actually store, or units that simply do not fit the room. Choosing the right boltless rack means working backwards from what you are storing, how heavy it is, and where the rack will physically sit. This guide walks through the practical factors that determine the right size and load capacity, so you can buy a rack that fits your space and holds up to daily use.

Understanding Height, Depth, and Length

Boltless racks are typically specified using three core dimensions, and each one affects how usable the rack will be in practice.

Height determines how many shelf levels you can fit and how much vertical storage you can capture from a limited floor footprint. Taller racks make sense in storerooms with high ceilings and infrequent access, where maximizing storage density matters more than convenience. In offices or backrooms where staff need to reach items regularly, a shorter rack with more accessible shelves is usually more practical, since anything above comfortable reach height slows people down or requires a step stool.

Depth affects what can sit on a shelf comfortably. A shallow shelf works well for files, stationery, or small retail stock but will leave larger boxes overhanging the edge, which is both a tripping hazard and a stability risk. A deeper shelf holds bulkier items but takes up more floor space and can make it harder to see or reach items stored at the back. Matching shelf depth to your actual product or document sizes, rather than choosing the deepest option available, keeps the rack efficient and safe.

Length, sometimes called width, is the horizontal span of a single bay. Longer bays cover more wall or floor space per unit and reduce the number of upright posts needed, but they also reduce the load a shelf can safely hold, since the weight is spread across a longer, less supported span. Shorter bays generally support more weight per shelf for the same materials and gauge of steel.

Before choosing dimensions, measure the room itself, including door widths and any turns the rack will need to pass through during delivery, along with ceiling height, clearance around the rack for staff to work safely, and the size range of what you intend to store. A rack that is technically well built but does not fit through the doorway or leaves no walking space around it is not a good investment.

What UDL Means in Boltless Shelving

Almost every boltless rack is rated using a figure called UDL, or Uniformly Distributed Load. This is the single most important number to understand before buying, and it is also the most commonly misread.

UDL describes the maximum weight a shelf can safely hold when that weight is spread evenly across the entire shelf surface. A shelf rated at 200 kg UDL is designed to hold up to 200 kg total, provided the load is distributed across the whole shelf rather than concentrated in one spot. Placing a single heavy item in the center of the shelf, rather than spreading similar loads across the surface, puts far more stress on that point than the UDL rating accounts for and can lead to bending or failure well below the stated capacity.

A few points are worth keeping in mind when reading UDL specifications:

  • UDL is per shelf level, not per unit, unless the listing specifically states a total unit capacity. A rack with four shelves rated at 200 kg UDL each does not necessarily support 800 kg if all four shelves are loaded at once. Check whether the manufacturer also lists a maximum total capacity for the whole unit.
  • Longer shelves generally carry a lower UDL than shorter ones built from the same materials, since the load is spread across a wider span with the same support structure.
  • Distribute weight evenly whenever possible. Heavier items placed toward the outer edges near the upright supports, with lighter items in the middle, generally place less stress on the shelf than a single heavy load in the center.
  • Never modify the rack to increase capacity. Drilling, cutting, or removing structural bracing to fit a different load compromises the rated capacity and creates a genuine safety risk.

As a general reference point, light-duty boltless racks are commonly rated in the range of roughly 100 to 250 kg per shelf, which suits offices, retail backrooms, and light storerooms. Medium-duty options typically fall in the 250 to 400 kg range and suit heavier retail stock, bulkier office supplies, or general storeroom use. Anything beyond that moves into heavy-duty racking territory, which is built with thicker steel and different structural bracing altogether.

Matching Rack Size to Storage Environment

The right rack size is not just a function of what you store. It also depends heavily on where the rack will be used day to day.

Storerooms tend to hold a mixed range of items, from bulk supplies to seasonal stock to equipment that is not used often. Storerooms generally benefit from taller racks with medium-duty UDL ratings, since floor space is often limited but ceiling height is available. Adjustable shelf heights are particularly useful here, since the mix of items stored often changes over time.

Offices usually store lighter, more uniform items such as files, stationery, boxed paperwork, and equipment. Light-duty racks with shallower shelves and lower overall height are generally sufficient, and a cleaner, more compact footprint tends to suit shared office spaces better than a tall industrial-style unit. Accessibility matters more here than raw capacity, since staff are retrieving items throughout the day rather than in bulk.

Retail backrooms sit somewhere between the two. They need to hold enough stock to keep the shop floor supplied without requiring constant restocking, but the space is often tight and shared with other functions such as staff areas or receiving. Medium-duty racks with a manageable footprint tend to work best, along with a layout that allows fast-moving stock to be placed at accessible heights near the front of the room, closer to the shop floor access point.

In each case, think about how often the rack will be accessed, by whom, and how quickly. A rack that is technically rated to hold the weight but is awkward to access every day will slow down operations even if it never fails structurally.

Choosing Shelf Materials

boltless rack material

The material used for the shelf surface itself affects both load capacity and suitability for different environments.

  • Particle board or chipboard decking is common in lighter-duty racks and works well for general office or light storeroom use. It is cost effective but less suited to damp environments or very heavy point loads.
  • Steel decking offers higher load capacity and greater durability, making it a better fit for storerooms and retail backrooms handling heavier or bulkier stock. It also holds up better under repeated loading and unloading.
  • Wire mesh decking allows better visibility of stored items and improves airflow and light penetration, which some retail backrooms and storerooms prefer for stock rotation and fire safety compliance.
  • Melamine or laminate-finished decking gives a cleaner appearance suited to offices or customer-adjacent storage areas, while still offering reasonable load performance for lighter items.

The frame material and steel gauge matter just as much as the decking. Thicker gauge steel in the uprights and beams generally allows for a higher UDL rating at the same dimensions, which is why two racks that look similar in size can carry very different loads.

Common Buyer Mistakes

Even with good intentions, a few recurring mistakes lead to racks that underperform or need to be replaced sooner than expected.

  • Choosing based on floor footprint alone. A rack that fits the available floor space but is rated for far less weight than what needs to be stored will either be overloaded or underused.
  • Ignoring the difference between per-shelf and total unit capacity. Assuming you can multiply the per-shelf rating by the number of shelves without checking the total unit capacity is one of the most common overloading mistakes.
  • Overlooking access clearance. Racks placed too close together or too close to walls make loading and unloading slower and increase the risk of items being knocked off shelves.
  • Buying the tallest option available “to be safe.” Extra height that goes unused is wasted cost, and shelves placed above comfortable reach are often ignored or accessed unsafely with makeshift stools.
  • Not accounting for future growth. A rack sized exactly for current stock levels can become a bottleneck quickly if inventory grows. Leaving some buffer capacity, or choosing a modular system that can be extended, avoids a full replacement later.
  • Skipping proper assembly. Boltless racks are designed for tool-free assembly, but that does not mean shortcuts are safe. Beams that are not fully seated into the uprights carry only a fraction of their rated load capacity, regardless of what the specification sheet says.

Choosing With Confidence

The right boltless rack is the one that matches your actual dimensions, your real load requirements, and the way your team will use the space day to day, not simply the largest or cheapest option on the page. Taking the time to measure your space, understand your UDL requirements, and think through how the rack will be used in practice pays off in a storage system that holds up over time instead of one that needs replacing within a year.

Browse our full range of boltless rack sizes and load capacities to find a configuration built for your storeroom, office, or retail backroom.

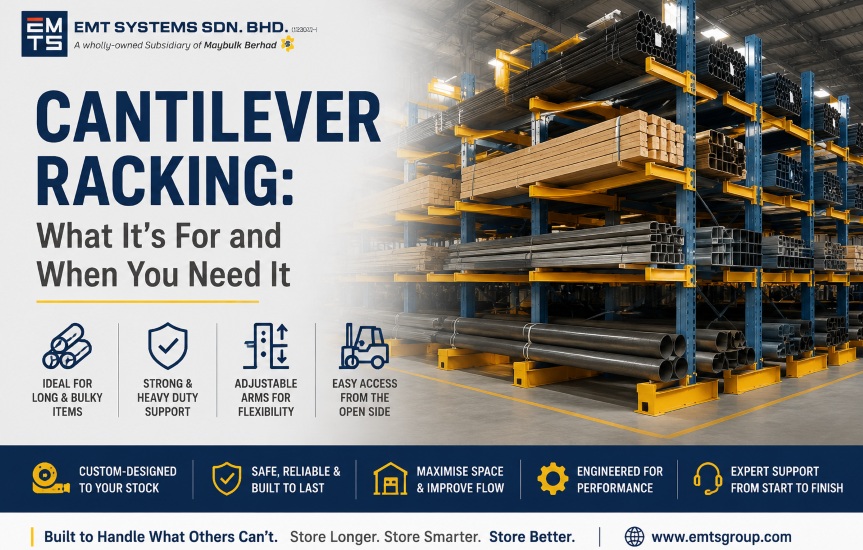
Cantilever Racking: What It’s For and When You Need It

cantilever racking
cantilever racking

If you’re storing pipes, timber, steel bars, furniture, or anything else that’s long and awkward to shelve, standard pallet racking probably isn’t the right fit. This is exactly the gap cantilever racking fills. Instead of shelves or decking, it uses horizontal arms extending out from a vertical column, giving you an open structure built specifically to hold long and bulky items that don’t fit neatly onto a pallet or into a frame.

What Is Cantilever Racking?

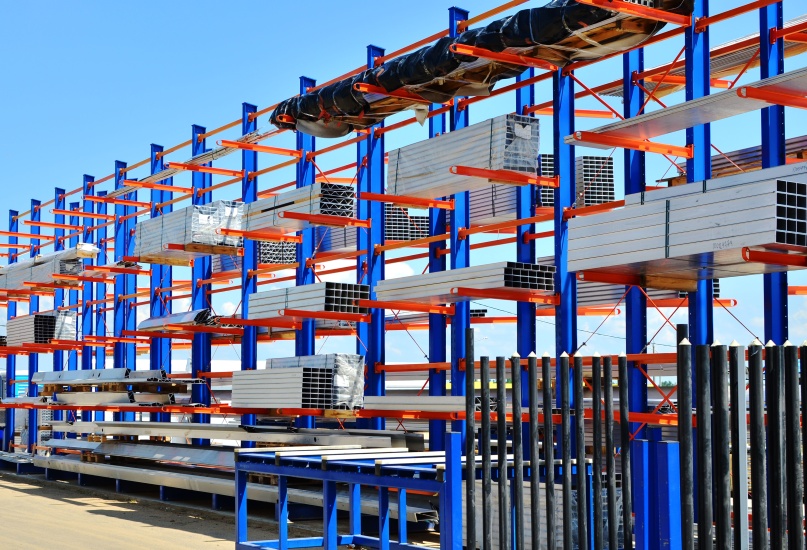
Cantilever racking is built from a series of vertical steel columns, each fitted with arms that extend outward to support the load. There are no front uprights blocking access, so you can load and unload items from the open side without sliding them between support posts, as you would with standard shelving.

Arm heights are usually adjustable, so the system can be reconfigured as your stock changes, and arms come in different lengths depending on how far the load needs to be supported. The result is a system that’s much better suited to oddly shaped, lengthy, or heavy materials than almost any other racking type.

What Cantilever Racking Is Used For

Cantilever racking is the standard choice across several industries where the products themselves don’t fit standard storage formats:

  • Timber and lumber yards use it to store long boards and beams without causing them to bend or warp.
  • Steel and metal fabrication businesses rely on it for bars, tubing, and structural steel sections.
  • Plumbing and building supply businesses use it for pipes and conduit of varying lengths.
  • Furniture manufacturers and showrooms use it to store finished pieces and long components.
  • Carpet and flooring suppliers often use it for rolled goods that need horizontal support along their length.

In short, if an item is long, heavy, or an awkward shape that doesn’t sit well on a flat shelf or pallet, cantilever racking is usually the answer.

Single-Sided vs Double-Sided Cantilever Racking

Cantilever systems come in two main configurations.

Single-sided cantilever racking has arms extending from one side of the column only. It’s typically used against a wall or where access is only needed from one direction.

Double-sided cantilever racking extends arms from both sides of the same column line, allowing access from either side. This makes more efficient use of floor space in open warehouse areas where loading and unloading can happen from both directions.

Light Duty vs Heavy Duty Cantilever Racking

Like most racking systems, cantilever racks come in a range of capacities. Light-duty cantilever racks suit smaller items such as PVC pipe, light timber, or smaller furniture components. Heavy-duty cantilever systems are built with thicker steel columns and reinforced arms to handle structural steel, large timber sections, or heavy metal stock. The right capacity depends on both the weight of individual items and the total load each arm and column must support across the full bay.

Advantages of Cantilever Racking

cantilever racking in malaysia

The open front design is the biggest advantage. Without front columns in the way, loading and unloading long items is far easier, and there’s no risk of items getting caught or damaged against support posts during handling.

Adjustable arm heights mean the system can adapt as your stock profile changes, rather than locking you into a fixed configuration. And because arms can be specified at different lengths, a single system can often handle a wide range of item sizes rather than needing several different storage solutions.

Things to Consider Before Choosing Cantilever Racking

Cantilever racking generally needs more horizontal floor space than other racking types, since the arms extend outward rather than stacking items vertically within a frame. If your warehouse is tight on floor space, this is worth factoring into your layout planning early.

Installation is also more involved than standard shelving or boltless racking, since column spacing, arm length, and load distribution all need to be planned around your actual stock rather than assembled from a generic kit. This is one of the reasons cantilever projects tend to be custom-designed rather than off-the-shelf. If you’re weighing this against other racking formats more broadly, our breakdown of different pallet racking types covers how cantilever stacks up against options like selective and drive-in racking for various storage needs.

Maintenance is another factor worth planning for. Because of its open structure and the way loads are distributed across its extended arms, repairing a damaged cantilever system often requires specialised equipment, such as an engineered rack-lifting jack, rather than a standard repair kit. Our guide on repairing, replacing, or upgrading a warehouse racking system goes into more detail on when repair makes sense versus when replacement is the safer option.

Is Cantilever Racking Right for Your Business?

Cantilever racking is worth considering if any of the following sound familiar:

  • You’re currently storing long items horizontally on the floor, which takes up space and creates a trip hazard.
  • Your inventory includes pipes, timber, steel bars, or similarly shaped materials that don’t fit pallet racking or standard shelving.
  • You need to load and unload from an open side rather than navigating between support posts.
  • Your stock sizes vary enough that a fixed shelf configuration doesn’t really work.
  • If none of these applies and you’re mostly storing palletised goods or boxed inventory, a standard pallet racking system is likely the better and more space-efficient fit.

Why Choose EMTS for Cantilever Racking

EMTS designs cantilever systems around your actual stock profile rather than offering a one-size-fits-all configuration. Our team will assess the length, weight, and shape of what you’re storing, then specify column spacing, arm length, and load capacity to match, with installation and aftermarket support handled as part of the same project.

Get a Cantilever Racking System Built Around Your Stock

If standard shelving and pallet racking aren’t cutting it for your long or bulky inventory, EMTS can design a cantilever system suited to exactly what you’re storing. Explore Our Cantilever Racking Range

Frequently Asked Questions

What items are best suited to cantilever racking? 

Long, bulky, or irregularly shaped items that don’t fit standard pallets or shelving, such as pipes, timber, steel bars, structural sections, and rolled materials like carpet.

How is cantilever racking different from pallet racking? 

Pallet racking is designed around standard pallet sizes stored on shelves or beams within a frame. Cantilever racking has no front structure at all, using extended arms instead, which makes it better suited to items too long or oddly shaped for a pallet.

Can cantilever racking be used outdoors? 

Yes, outdoor cantilever systems are common for storing timber, pipes, and steel stock in yards, though the structure needs to be specified for outdoor conditions from the start.

Is cantilever racking more expensive than standard racking? 

Cantilever systems are generally custom-designed around your specific stock, so pricing depends on column height, arm length, load capacity, and quantity rather than a fixed standard cost. A tailored quote is the most accurate way to know what your specific setup will cost.

Can cantilever racking be adjusted after installation? 

In most cases, yes. Arm heights can typically be repositioned on the column to accommodate changes in stock size, though major changes to arm length or load capacity usually require professional reassessment.

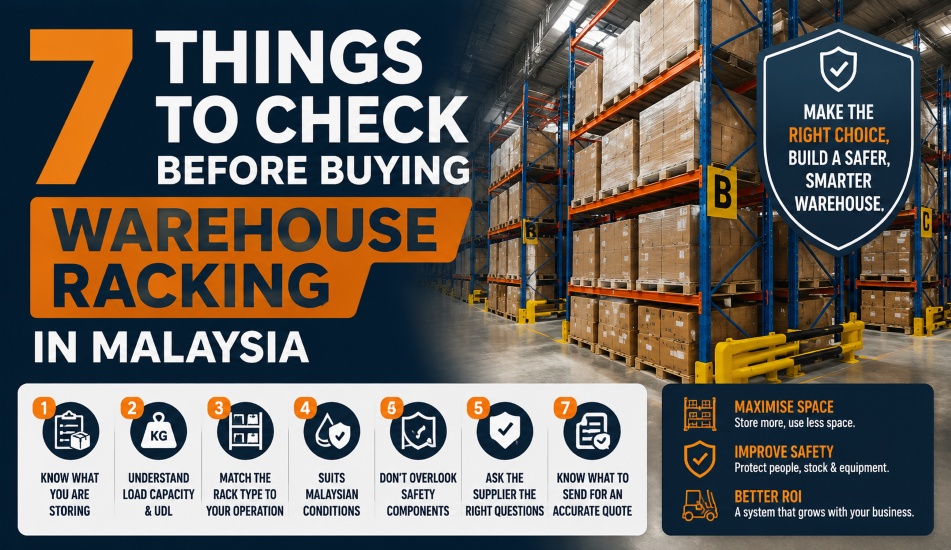
7 Things to Check Before Buying Warehouse Racking in Malaysia

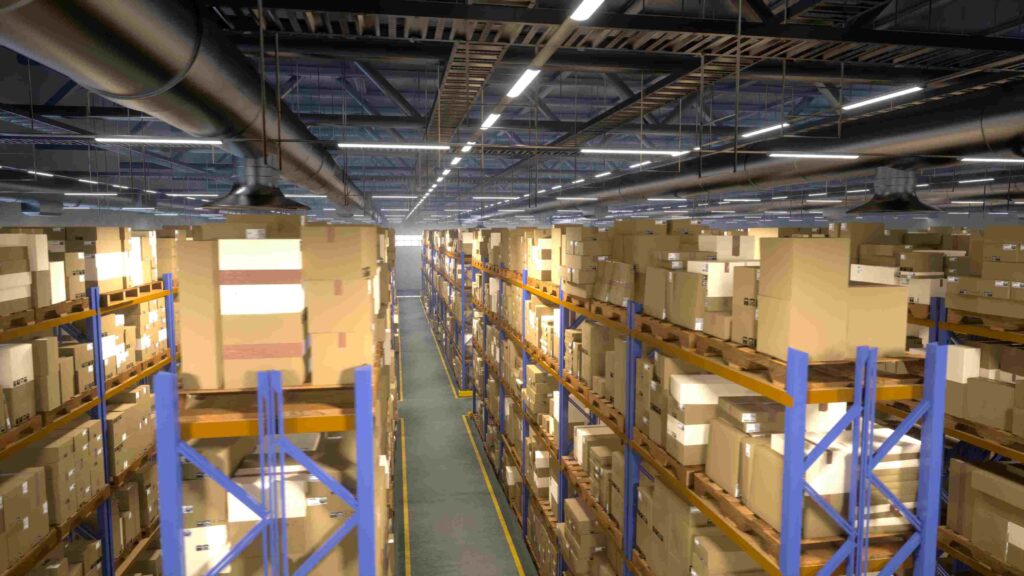
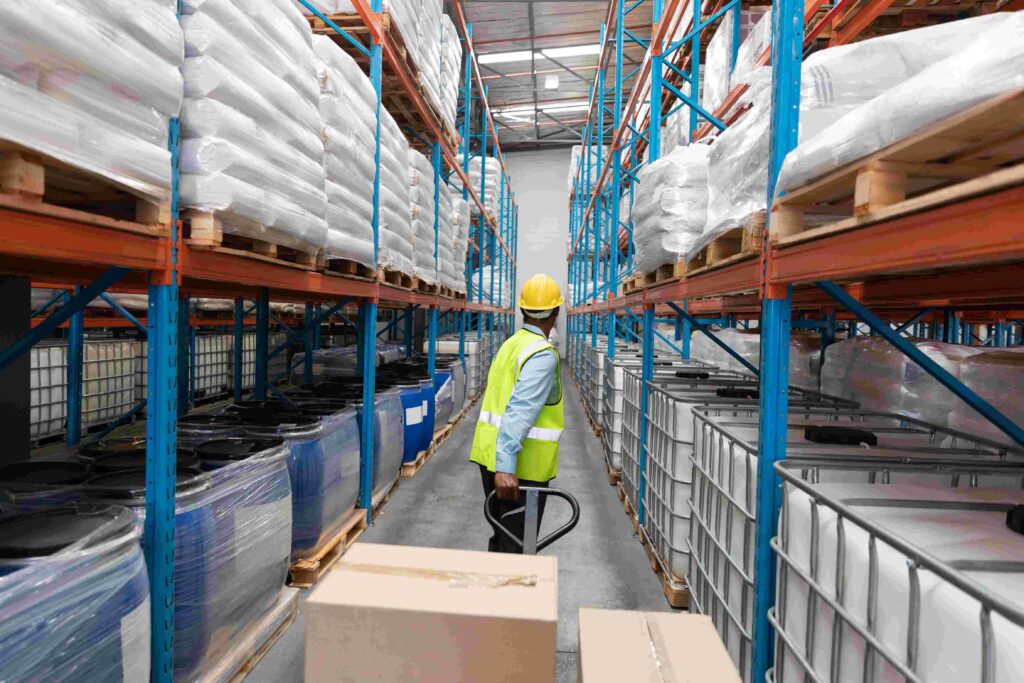
warehouse racking
warehouse racking

Buying a warehouse racking system is a bigger decision than it first appears. The right choice keeps your stock accessible, your workers safe, and your floor space working as hard as it can. The wrong one leads to wasted space, damaged goods, safety risks, and the cost of replacing a system that never fit your operation.

Here are seven things to check before you commit, written for Malaysian operations where humidity, safety expectations, and building constraints all shape the right decision.

1. Start With What You Are Storing, Not the Rack

The most common mistake is choosing a rack type before understanding the load. Every good racking decision starts with the product.

Before you speak to a supplier, gather:

  • Heaviest pallet weight, including packaging. Not the average, the heaviest.
  • Pallet dimensions and type, whether standard, euro, or custom
  • Number of pallet positions you need now, plus a realistic estimate for growth
  • SKU count and picking frequency, meaning how often stock moves in and out
  • Clear ceiling height and any obstructions such as beams, sprinklers, or lighting

A system designed around average pallet weight can become unsafe the moment your heaviest loads go in. Your quote should reflect real load data, not rough estimates.

2. Understand Load Capacity and UDL

Load capacity is the most important safety factor in any racking system, and it is where cheaper systems quietly cut corners.

Racking load is usually expressed as UDL, or Uniformly Distributed Load. This is the maximum weight a beam level can safely hold when the weight is spread evenly. A beam rated at 2,500kg UDL is designed to carry that load when pallets sit evenly across it, not concentrated in one spot.

Two things to check:

  1. The total rack rating is only as strong as its weakest part. Damage to a single upright or beam reduces the integrity of the whole system.
  2. Ask for the UDL load tables. A reputable Malaysian manufacturer publishes UDL ratings for different beam lengths and upright configurations. If a supplier cannot show you these, treat it as a warning sign.

For a fuller explanation of how to match rack design to pallet weight, our heavy-duty rack load capacity guide works through the calculations in detail.

3. Match the Rack Type to How Your Warehouse Runs

There is no single best racking system, only the one that fits your operation. The right configuration depends on how you balance storage density against access.

  • Selective pallet racking gives direct access to every pallet. It is the simplest and most flexible choice, ideal for operations with many SKUs and frequent picking.
  • Double deep racking stores two pallets deep, increasing density but requiring deep-reach forklifts.
  • VNA racking uses very narrow aisles to maximise floor space and height, with specialised trucks. It is increasingly popular in Malaysia where floor space is expensive.
  • Drive-in racking offers very high density for bulk storage of low-SKU-variety stock.

Choosing between these becomes easier once you know your pallet profile and picking pattern. Our guide on selecting the right warehouse racking system compares them side by side.

4. Check the System Suits Malaysian Conditions

This is where global buying guides fall short, and local operations get caught out.

  • Humidity and corrosion. Malaysia’s climate is hard on steel. Ask about protective coatings and finishes, especially for damp environments, cold storage, or facilities near the coast. Galvanised or properly powder-coated steel resists rust far better over time.
  • Flood-prone areas. If your location carries any flood risk, stable bases and corrosion-resistant construction matter more, not less.
  • Local safety expectations. Warehouse racking should be installed and loaded in line with recognised safety practice. Load signage, proper aisle widths, and rack protection are not optional extras. They protect both your people and your stock.

5. Do Not Overlook Safety Components

The rack frame is only part of a safe system. When comparing quotes, check what safety components are included rather than added later at extra cost:

  • Rack guards and column protectors to absorb forklift impact
  • Safety netting or mesh where pallets could fall into walkways
  • Beam locks to prevent accidental dislodging
  • Load notice plates showing the rated capacity of each bay

A quote that leaves these out may look cheaper, but the cost reappears the moment you add them.

6. Ask the Supplier the Right Questions

Selecting a racking supplier involves more than comparing prices. Before you commit, ask:

  • Can you show me your UDL load tables for the beams you are quoting?
  • Is the steel finish suitable for my warehouse environment?
  • Are safety components included in this quote, or priced separately?
  • Do you handle delivery and installation, or is that arranged separately?
  • Can the system be expanded or reconfigured as we grow?
  • Do you manufacture the racking yourselves, or resell it?

That last question matters. Buying from a manufacturer rather than a reseller usually means better pricing, direct customisation, and a single point of accountability if anything needs adjusting.

7. Know What to Send for an Accurate Quote

To get a quote built around your operation rather than a generic estimate, send your supplier:

  • Pallet dimensions and heaviest pallet weight
  • Number of pallet positions required
  • Forklift type and clear ceiling height
  • Photos of the space, and of any existing racking
  • Project timing, and notes on any old rack that needs removal

The more accurate your information, the more accurate and safer the system you receive.

Making the Right Choice

Buying warehouse racking comes down to matching load, access, and site conditions to a system built for your operation, from a supplier who can stand behind it. Get the inputs right, and you get years of safe, efficient storage. Get them wrong, and you pay to fix it.

As a Malaysian racking manufacturer, EMT Systems helps warehouse operators specify systems around their real pallet profile, SKU flow, and site conditions rather than off-the-shelf guesses. If you are planning a new system, an upgrade, or a reconfiguration, talk to our team, and we will help you get the specification right from the start.

Frequently Asked Questions

How do I know what load capacity I need?

Start with your heaviest pallet, add a safety margin of 10 to 15 per cent for forklift handling, and compare it against the supplier’s UDL load tables. Never plan around average weight alone.

Should I buy from a manufacturer or a reseller?

A manufacturer typically offers better pricing, direct customisation, and clearer accountability, because there is no middleman between you and the people who build the rack.

What racking type is best for a warehouse with limited floor space?

VNA racking maximises height and density in narrow aisles, though it needs specialised forklifts. Double deep is another space-saving option for lower-SKU operations.

Does racking need special treatment for Malaysia’s climate?

Yes. Humidity accelerates corrosion, so galvanised or properly powder-coated finishes are worth specifying, particularly for cold storage, coastal sites, or damp environments.

What information should I give a supplier for a quote?

Pallet dimensions and weight, number of positions needed, forklift type, clear height, photos of the space, and project timing. Accurate inputs produce accurate, safe quotes.

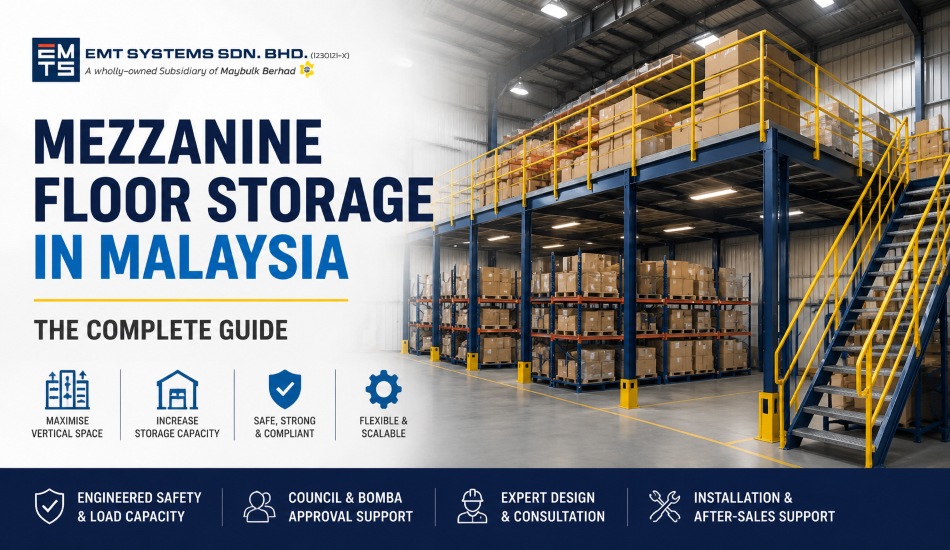
Mezzanine Floor Storage in Malaysia: The Complete Guide

Mezzanine Floor Storage in Malaysia
 Mezzanine Floor Storage in Malaysia

A mezzanine floor is an intermediate platform built within an existing building’s height, creating an extra usable level without extending the building’s footprint. In the racking and storage industry, this is also referred to as a superblock platform, interblock system, or platform storage, different names for systems that all solve the same problem: how to get more usable space out of a warehouse you already have, simply by building upward into space that’s currently going unused above head height.

If you’re running out of floor space but still have unused vertical clearance, a mezzanine floor is often the most cost-effective way to expand well before considering a costly relocation or building extension.

What Is a Mezzanine Floor and How Does It Work?

A mezzanine floor sits between the ground floor and the ceiling of a warehouse or industrial unit, supported by a steel structure of columns or racking, with decking on top to create a walkable, loadable surface. It’s a freestanding structure, which means it generally doesn’t need to be bolted to the building’s walls making it possible to disassemble, relocate, or expand later if your needs change.

Because it doesn’t require extending the building itself, a mezzanine floor can typically be installed with far less disruption, cost, and approval complexity than constructing an actual second storey.

Types of Platform Storage Systems

Not all mezzanine-style platforms are built the same way. The two main approaches are:

Superblock platforms use a column-based structure rather than a frame-based one, which means fewer obstructions underneath the platform and better movement and forklift access at ground level. This makes superblock systems well-suited to warehouses that need to store palletised goods both above and below the platform, and they can often be built and expanded in stages as your storage needs grow.

Rack-supported or multi-tier platforms build the elevated level on top of an existing racking structure instead of a separate column system. This tends to be a more cost-effective option where you’re already using racking and want to add a storage or walkway level above it, though it generally offers less flexibility for reconfiguration than a superblock system.

Which one makes sense depends on your existing layout, what you’re storing both above and below the platform, and how much future flexibility you want to build in.

Why Businesses Use Mezzanine Floors

The core appeal is simple: more usable space, in the same footprint. Beyond pure storage, mezzanine floors are commonly used for:

  • Additional pallet or shelving storage, effectively doubling the storage capacity of existing floor space
  • Administrative or office space, keeping staff close to operations while freeing up ground-floor area
  • Quality control or inspection zones, separated from the main flow of goods
  • Light assembly or packing areas, without competing for ground-floor space used for heavier logistics

Because the structure is modular, many providers EMTS included can build a mezzanine in stages, helping spread the investment rather than committing to the full structure all at once.

Regulatory and Safety Considerations in Malaysia

This is the part most businesses underestimate when they first start looking into mezzanine floors. Because a mezzanine is a structural addition, it typically isn’t a simple “buy and install” purchase; there are real regulatory steps involved:

  • Local council (PBT) approval is generally required, since the structure adds usable floor area to the building.
  • Fire department (BOMBA) clearance is typically required as well, particularly regarding fire rating, sprinkler coverage, and emergency access. This becomes more important the larger and more heavily used the mezzanine level is.
  • Structural sign-off from a qualified engineer is standard practice, confirming the platform’s load capacity is properly calculated for its intended use before it’s put into service.
  • Minimum ceiling clearance matters, too. You’ll generally need enough total height in your building to comfortably fit both levels plus structural beam depth, so it’s worth checking your actual ceiling height before assuming a mezzanine will fit.

None of this is meant to discourage the investment mezzanine floors are installed in industrial buildings across Malaysia all the time but it’s worth planning for these steps from the start rather than treating them as an afterthought. A good supplier should be able to guide you through the approval process, not just the installation.

How Much Does a Mezzanine Floor Cost in Malaysia?

Costs vary significantly depending on the platform size, required load capacity, decking material, and whether you’re building a simple static storage level or a heavier-duty platform designed for palletised goods or machinery. As a general ballpark, industry pricing in the Malaysian market often starts in the region of a few hundred ringgit per square metre for lighter-duty platforms, climbing significantly for heavy-duty, large-span structures, but this varies enough between projects that it’s genuinely worth getting a quote based on your specific space and load requirements rather than relying on a rule-of-thumb figure.

Is a Mezzanine Floor Right for Your Warehouse?

A mezzanine floor tends to make the most sense when:

  • You have unused vertical clearance, but limited floor space to expand into
  • Relocating or extending the building isn’t a realistic option right now
  • You need a flexible space that could serve as storage now and office or production space later

If you’re earlier in the process of figuring out how to get more out of your existing warehouse, our guides on how to increase warehouse storage capacity and warehouse design and layout are good starting points before deciding whether a mezzanine is the right next step or whether reorganising your existing racking would solve the problem first. And if load capacity is the main thing on your mind, our heavy duty rack load capacity guide covers how load ratings are calculated, which applies just as much to platform storage as it does to standard racking.

Why Choose EMTS for Your Mezzanine Floor

EMTS Group designs and fabricates mezzanine and platform storage systems as part of our core product range, alongside our racking and shelving solutions. As a subsidiary of Maybulk Berhad with both Penang and Selangor operations, and an established OEM/ODM track record serving clients internationally, we manage the full process from layout consultation and structural design through to fabrication, installation, and aftermarket support, including helping you plan around the approval and compliance steps described above, rather than leaving you to navigate them alone.

Make the Most of Your Warehouse’s Vertical Space

If floor space is running out but your ceiling height isn’t being fully used, a mezzanine floor could be the most cost-effective way to expand without relocating. Our team can assess your space and help you plan a system that meets both your storage needs and regulatory requirements.

Frequently Asked Questions

What’s the difference between a mezzanine floor and a second storey? 

A mezzanine floor is generally a freestanding structure that doesn’t require the same level of building modification as adding an actual second storey, which makes it faster to install and typically subject to a simpler approval process, though approval is still required.

Do I need council approval to install a mezzanine floor in Malaysia? 

In most cases, yes. A mezzanine is considered a structural addition and typically requires approval from the local municipal council (PBT) and clearance from the fire department (BOMBA), as well as a structural engineer’s sign-off on load capacity.

Can a mezzanine floor be removed or relocated later? 

Yes, in most cases. Because mezzanine and superblock platforms are generally modular, freestanding structures rather than permanently bolted to the building, they can typically be disassembled and reinstalled elsewhere if you relocate or reconfigure your space.

How much weight can a mezzanine floor hold? 

This depends entirely on the structural design; mezzanine floors can be engineered for light foot-traffic storage or for much heavier loads, including palletised goods and machinery. The exact capacity needs to be calculated and certified by a structural engineer based on your intended use.

What’s the difference between a superblock platform and a rack-supported platform? 

A superblock platform uses a column-based structure independent of any racking, offering more flexibility and fewer obstructions at ground level. A rack-supported platform builds the elevated level on top of existing racking, which can be more cost-effective but generally offers less flexibility for future reconfiguration.

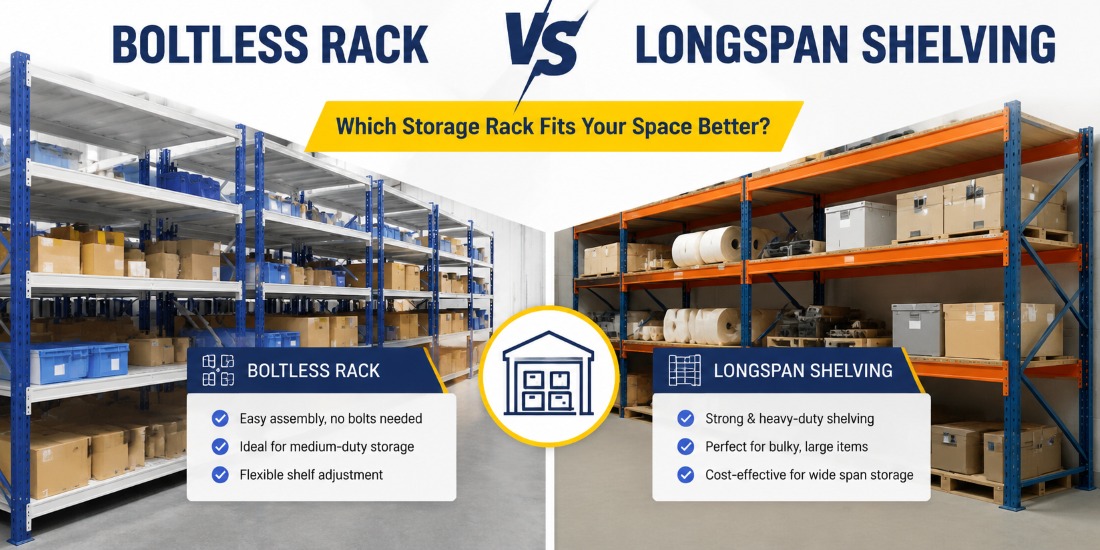
Boltless Rack vs Longspan Shelving: Which Storage Rack Fits Your Space Better?

Boltless Rack vs Longspan Shelving

Boltless racks and longspan shelving often get compared as if they’re two completely different systems, but they’re closer relatives than most buyers realise. Both are typically tool-free, assembled with a rubber mallet rather than with nuts and bolts, and designed for hand-loaded storage rather than forklift pallet handling. The real difference is capacity and span. Longspan shelving is best thought of as the heavier-duty end of the boltless family, built with thicker steel and longer beams to carry more weight across a wider shelf. Understanding where standard boltless racking tops out and where longspan racking picks up is key to choosing the right one for your space.

What Boltless Racks Are Best For

Boltless Rack

Boltless racks are the go-to choice for light-to-medium storage needs where assembly speed and flexibility matter more than raw capacity. They’re built from steel uprights and shelves that click or rivet into place, with no nuts, bolts, or screws required.

Boltless racking works well for:

  • Office archives and document storage
  • Storerooms and back-of-house stock areas
  • Retail backroom storage
  • Light parts and tool storage in workshops
  • Any space where shelving needs to be reconfigured or relocated often

Because they’re lighter-duty by design, boltless racks are also generally more affordable and easier to fit into smaller or irregularly shaped spaces.

What Longspan Shelving Is Best For

Longspan shelving uses the same general tool-free assembly principle as boltless racking, but with a heavier-gauge steel frame, a longer beam span, and full-width decking built to carry bulkier, heavier loads. It’s the better choice when you’re storing items that are too large or too heavy for standard boltless shelves to handle comfortably.

Longspan shelving is well-suited to:

  • Carton and box storage in warehouses
  • Spare parts and mixed-SKU inventory
  • Manual picking environments where forklift access isn’t needed
  • Retail and automotive workshop storage of bulkier stock
  • Warehouses that need fewer uprights to cover more storage area per bay

Because longspan shelving doesn’t always require a bottom beam, it can also support ground-level storage of bulkier items alongside the shelving above, something standard boltless racks aren’t typically built for.

Load Capacity and Span Differences

This is where the two systems really separate. Boltless racks are designed for lighter, evenly distributed loads, think files, small parts, or stacked cartons within a standard shelf depth. Longspan shelving is engineered for heavier point loads distributed across a longer beam, which allows it to handle bulkier cartons and parts without needing additional uprights every shelf width.

As a rough rule of thumb: if what you’re storing is starting to feel heavy for a standard shelf, or you need a single shelf to span a wider gap without an extra support post in the middle, you’ve likely outgrown boltless and are looking at longspan territory.

Assembly and Adjustment Differences

Both systems are designed for tool-free assembly, which is one of the main reasons buyers group them together in the first place. The practical difference shows up in the build itself: boltless racks are lighter to handle during assembly and quicker to reconfigure, since the components themselves are smaller and easier to manoeuvre. Longspan shelving’s heavier steel and longer beams mean assembly still doesn’t require bolts or screws, but the components are bulkier to position, and reconfiguring a longspan bay is a slightly bigger job than adjusting a boltless shelf height.

Both systems can typically be disassembled and relocated if you move premises or reconfigure your space, a genuine advantage over fixed bolted shelving for either option.

Best Use Cases by Environment

  • Office storage: Boltless racking is almost always the right fit here. Document storage and office supplies rarely need long-span-level capacity.
  • Retail backroom: Boltless racks suit most backroom stock, though stores handling bulkier inventory (large appliances, bulk packaging) may benefit from longspan in specific areas.
  • Storeroom / light warehouse: Either can work depending on what’s being stored; this is the zone where it’s most worth checking actual item weight and size before deciding.
  • Medium-duty warehouse: Longspan shelving is generally the better fit once you’re storing cartons, spare parts, or mixed inventory at scale, since it covers more storage area with fewer uprights.

Which One Should You Choose?

Rather than treating this as a head-to-head choice, it’s more useful to think of it as a capacity-threshold question: start with what you’re storing and let the weight and size of those items point you toward the right tier.

  • If your stock is light, your space is small, and you value quick reconfiguration, boltless racking is almost certainly the right call.
  • If your stock is bulkier or heavier than standard boltless shelves can comfortably handle, or you need fewer uprights covering more shelf area, longspan shelving is the next step up.
  • If you’re not sure where your storage needs actually fall, that’s exactly the kind of question worth getting an honest answer to before you buy, rather than guessing and having to upgrade later.

Not Sure Which Fits Your Space?

Both boltless racks and longspan shelving are part of our core product range, and our team can help you determine which one or which combination best fits your storage needs, space, and budget.

Introduction to Warehouse Design and Layout

warehouse design and layout
Managing Warehouse Design And Structure

A warehouse is the core of the logistics and supply chain. They receive materials, store products, and fulfill orders. Warehouse design and internal and external layout are super important. They affect how well businesses work and succeed. In this article, we’ll talk about warehouse design and different layouts. We’ll also give you some helpful tips to make your warehouse work better.

Efficient warehouse design and layout are pivotal for a variety of reasons. Warehouse design isn’t about setting up shelves and racks. It’s about organizing space, processes, and resources for a smooth flow of materials and products. Every layout has its benefits and is best for certain business needs. We’ll help you choose the right one for your operation. 

After reading this article, you’ll know how to set up your warehouse for success.

What is Warehouse Design and Layout?

Warehouse design and layout consists of its physical structure and various components. An effective warehouse layout guarantees that employees have adequate space to function at peak efficiency, resulting in a more streamlined inventory flow with reduced time wastage.

The six basic tasks that make warehouse operations are:

  • Receiving
  • Putaway
  • Storing
  • Picking
  • Packing
  • Shipping

Improving these processes is essential for cutting costs, lowering mistakes, and getting a higher rate of perfect orders. This can improve both customers’ happiness and business performance.

Why Are Warehouse Layout Plans Important?

A warehouse layout plan plays a crucial role in the overall efficiency of operations. It is designed to meet the needs of employees while optimizing the manufacturing process. The primary objective of a warehouse layout plan is to facilitate the smooth flow of work, materials, and information throughout the racking system.

The overall design and layout of a warehouse should address all these requirements:

  • Optimising the use of the available space
  • Minimising the handling of goods
  • Ensuring convenient access to the stored product
  • Achieving the maximum rotation ratio attainable
  • Providing the best ability in product placement
  • Managing the amount of goods stored

Types of Warehouse Design and Layout

When planning a warehouse, you can choose from three different layouts:

  1. U-Shaped Design
  2. I-Shaped Design / Straight-Line Flow Design
  3. L-Shaped Design

Each has benefits for specific tasks. Choosing the right warehouse design is essential for maximising your storage space and improving efficiency. Let’s delve deeper into the various types of warehouse layout designs:

U-Shaped Design


u shaped design warehouse

(Source: Bigrentz)


The U-shaped warehouse design looks like a U or horseshoe inside the building. To make the most of a warehouse’s space, keep management centralised, and move goods quickly from the receiving area to the shipping area, a U-shaped plan is the way to go. The U-shape form can make the best use of room and keep things from moving around too much. Plus, it puts the operating area in one place, which improves planning and control.

Advantages of U-shaped layouts include:

  • Efficient Flow: The U-shaped layout makes it shorter for materials to move around, which reduces congestion and traffic jams in the warehouse. This is especially valuable for operations with high volumes of goods moving in and out.
  • Streamlined Processes: With a U-shaped layout, you make a clear path for goods, making picking, packing, and shipping easier and more efficient. This design promotes a logical sequence of operations.
  • Optimized Space: The design allows for efficient use of available space. The central area within the U can be used for various purposes, such as staging and sorting, making the most of the square footage.

Disadvantages of U-shaped designs are:

  • Congestion: High-traffic regions near receiving and shipping zones might become crowded.
  • Complex Design: Needs careful planning to prevent bottlenecks and streamline operations.

T-Flow Warehouse Design

A variation of the U-shaped design plan is the T-flow warehouse layout, where receiving and shipping are located on the same side. However, the inflow and outflow occur at opposite ends, as the bays do not face the same direction. The main advantage of this design is that it improves control by separating entry and exit points, whereas the disadvantage is that it requires more space for maneuvering.

I-Shaped Design


i shaped design warehouse

(Source: Bigrentz)


I-shaped warehouse design is also known as Straight-line flow design. In contrast to the U-shaped layout, the I-shaped warehouse design is linear, featuring a single corridor with storage on either side. This layout is ideal for small warehouses and businesses that prioritize simplicity and straightforward navigation.

Advantages of I-shaped layouts include:

  • Straightforward Layout: The I-shaped design works well for long and narrow warehouses. It’s also good when a single corridor is enough for operations. It simplifies navigation and is easy to understand for both staff and visitors.
  • Clear Aisles: Ensure the aisle space is well-organized and easy to access, with storage on both sides of the central corridor. Proper racking and shelving systems are key to maximizing the limited space.
  • Efficient Flow: An I-shaped layout promotes a linear flow of goods, making it suitable for businesses with continuous and consistent inventory movement.

Disadvantages of I-shaped designs are:

  • Inflexibility: Not great for complicated tasks that need to be handled or processed in more than one step.
  • Scalability: May become inefficient with an increase in the volume of goods or the complexity of operations.

L-Shaped Design


l shaped design warehouse

(Source: Bigrentz)


The L-shaped efficient warehouse layout design consists of two adjacent corridors intersecting at a right angle, forming an L shape within the facility. It’s flexible enough to cater to a lot of different requirements and odd-shaped spaces. This plan really excels when it comes to streamlining operations, making it easier to handle supplies, and handling a wide range of products. It also does a great job of keeping the receiving and shipping areas clear, which makes it a great choice for stores that need that feature.

Advantages of L-shaped layouts include:

  • Versatility: L-shaped designs are adaptable to various building shapes and sizes. This versatility makes them popular for larger warehouses with diverse storage needs.
  • Visibility: The right-angle intersection of the corridors provides excellent visibility, which can help manage inventory, locate items, and ensure safety in the warehouse.
  • Efficient Zoning: The L-shaped layout allows for effective zoning, which means you can dedicate specific areas to different functions like storage, packing, and order picking. This separation can improve the flow and organization of operations.

Disadvantages of L-shaped designs are:

  • Complexity: Navigation can be more challenging than I-Shaped layouts.
  • Inefficiency: Needs careful planning; failure to arrange the layout might cause inefficient mobility between zones.

Six Tips for Effective Warehouse Design and Layout


effective warehouse design and layout


1. Space Out the Loading and Unloading Area

Efficiently managing the loading and unloading area is vital for your warehouse’s flow of materials. Here are some warehouse layout considerations:

  • Location Matters: Place the loading and unloading zones near the shipping and receiving doors. This minimizes the distance goods need to travel and reduces the chances of congestion.
  • Well-Defined Zones: Mark loading and unloading areas with floor markings and signage. Choose specific areas for different types of shipments (inbound, outbound, etc.), and ensure employees are aware of these zones.
  • Efficient Handling Equipment: Invest in appropriate material handling equipment such as forklifts, pallet jacks, pallet racks, and conveyors to hurry the movement of goods. Maintain and service this equipment to prevent breakdowns and delays.
  • Safety Measures: Put in place safety measures, including safety barriers, proper lighting, and training for employees working in these areas. Safety is paramount, and a safe working environment prevents accidents and ensures a smoother workflow.

2. Separate the Reception Area

The reception area is where incoming shipments are processed. Keeping it separate from the main storage and picking zones is essential for efficient warehouse operations:

  • Incoming Inspection: Ensure a dedicated space for inspecting and verifying incoming goods. This area should be equipped with tools and technology for checking the quality and quantity of received items.
  • Temporary Storage: If there are delays in processing incoming goods, have a designated temporary storage area. This prevents incoming shipments from blocking the path of outbound shipments and maintains a smooth workflow.
  • Paperwork and Documentation: Set up a workstation for paperwork and documentation. Having a specific area for this task helps in keeping records organized and prevents paperwork from cluttering other workstations.

3. Organize the Storage Areas

An organized storage area is essential for maximizing sufficient space and ensuring easy product access. Here’s how to achieve this:

  • Efficient Racking Systems: Invest in the right type of racking systems that optimize vertical space and allow for efficient use of cubic storage. Consider adjustable racks that can adapt to your evolving storage capacity needs.
  • Aisle Space: Maintain clear, wide aisles for easy navigation. Adequate ample space is essential for the safe movement of employees and equipment and quick product access.
  • Product Grouping: Group similar products to create zones for specific product categories. This not only streamlines the picking process but also helps in inventory management and stock rotation.
  • Inventory Management Systems: Implement an advanced warehouse management system to track stock levels, manage replenishments, and optimize storage and space utilization. Real-time data and analytics can help in making informed decisions about storage allocation.

4. Create a Separate Picking Area

Efficient order picking is crucial for timely and accurate order fulfilment. Here’s how to create an effective picking area:

  • Logical Shelving and Racks: Arrange shelves and racks logically, placing frequently picked items at easily accessible heights. Use bins, totes, or carton flow systems to facilitate efficient picking.
  • Pick Paths: Designate clear pick paths and use signage to guide pickers. Minimize the distance and steps involved in picking items, and organize the layout to reduce the chances of congestion or bottlenecks.
  • Technology Integration: Consider implementing barcode scanners or RFID systems for accurate and efficient picking. These technologies reduce errors and improve order accuracy.
  • Batch Picking: If applicable, use batch-picking strategies to consolidate orders and reduce the number of trips pickers must make through the warehouse. This improves productivity and reduces labour costs.

5. Adjust the Shipping and Packing Area

The shipping and packing area is where the final stages of order processing occur. To make this area more efficient:

  • Optimize Packing Stations: Create well-organized packing stations with all the necessary materials and equipment. Ensure that packing stations are ergonomically designed to reduce packing times and prevent errors.
  • Quality Control: Implement quality control measures in the packing area to catch discrepancies or errors before products are shipped to customers. This includes checking items for accuracy, condition, and proper packaging.
  • Shipping Schedule: Establish a regular shipping schedule to maintain a predictable workflow. Coordination with carriers or transport services is essential to ensure timely pickups and deliveries.
  • Packaging Materials: Maintain a stock of various packaging materials, including boxes, padding, and labels. Having a well-stocked inventory of these materials prevents last-minute delays due to shortages.

6. Choose the Correct Tools

Choosing the right tools is essential for efficient warehouse operations, regardless of what is being stored. The tools selected should align with the available space, as different equipment has varying space requirements. For instance, a forklift requires more room to operate than a pallet jack.

  • Forklift: A forklift is one of the most common and essential tools in warehouse operations. Standard forklifts typically require aisles that are at least 12 feet wide. They are highly effective for indoor use, allowing the movement of large, bulky items and pallets throughout the facility.
  • Pallet Jacks: Pallet jacks are crucial for warehouse operations and come in two types; manual and electric. Both are designed for short distances and light loads, making them ideal for use in confined spaces within a warehouse.

Conclusion

Warehouse design and layout are fundamental to optimizing operational efficiency and customer satisfaction. By choosing the right design type for your rack system warehouse and following these six tips, you can create an organized and efficient warehouse space that will contribute to the success of your business. Get in touch with EMTS Group today, and let’s begin the exciting journey of transforming your warehouse into a high-performing space that maximizes efficiency and productivity. Remember that the specific design and layout should align with your unique business needs and goals, so always tailor your warehouse setup.

How to Increase Warehouse Storage Capacity

increase warehouse storage

male staff using pallet jack warehouse

In the fast-paced realm of business and logistics, the difference between thriving and surviving often boils down to one critical factor: space. A warehouse is the heart of your operations, and its capacity to accommodate inventory growth can either propel your business to new heights or hold it back.

Picture this: a warehouse that not only stores your products but does so efficiently, effortlessly, and cost-effectively. Imagine having the space to expand your product lines, scale your operations, and meet the ever-growing demands of your customers.

In this article, we’re here to show you why expanding your warehouse storage capacity is crucial and convince you that it’s not just an option – it’s a necessity. We’ll take you on a journey through the art of space optimization, revealing how strategic storage solutions can help you achieve new heights of efficiency and profitability.

If you’re eager to witness the transformation of your storage space into a powerful asset, stay with us. We’re about to unveil a world of possibilities where your warehouse isn’t just a storage facility; it’s the cornerstone of your competitive advantage. Get ready to embark on a journey towards unlocking the full potential of your warehouse and redefining the way you do business.


7 Tips To Maximize Warehouse Space Utilization

Running out of warehouse storage space is a common challenge for businesses as they grow and evolve. Fortunately, several effective strategies exist to increase your warehouse’s storage capacity. 

warehouse management system

1. Implement Warehouse Management Systems

Directed put-away, facilitated by a warehouse management system, optimizes warehouse space. Instead of placing pallets wherever convenient, directed put-away guides pallets to the most suitable locations, making the most of available space.

vertical space

2. Utilize Vertical Space

Extending your racks vertically is often the easiest and most immediate way to create additional warehouse storage space. In most modern buildings with ESFR (Early Suppression Fast Response) fire suppression systems, you can store inventory within 18 inches of the ceiling. However, ensuring that your rack uprights and base plates are appropriately sized is essential. Consulting with a structural engineer and a Professional Engineer (PE) can help confirm the viability of rack extensions.

narrow aisle

3. Narrow Aisle Layout

Reducing aisle width in the racking area can save substantial space. Wide aisles typically range from 10 to 12 feet, but narrowing them to five to eight feet can save up to 20% of your warehouse’s area. However, this strategy requires carefully evaluating your lift equipment’s compatibility with narrower aisles and may involve additional expenses, such as wire guidance for navigation.

mezzanine floor

4. Install Mezzanine Floors

Installing a mezzanine above floor-level processes, such as shipping or receiving areas, can effectively double your floor space. While mezzanines offer significant benefits, ensuring that your floor loading capacity can support them is crucial. Additionally, consider the potential presence of columns and base plates that may impact processes below the mezzanine.

double deep storage medium

5. Change Storage Medium

Switching to higher-density storage racking for warehouses can increase storage capacity, such as double-deep racking systems, push-back racks, or drive-in storage racks. These options are excellent for adding storage but may affect the accessibility of first-in, first-out (FIFO) inventory.

storage packaging

6. Change Packaging

Review your packaging and storage media to minimize the space each item occupies. Smaller packaging or platform solutions can save space, while more significant mediums may be more space-efficient for full-pallet quantities.

automation for warehouse

7. Consider Automation

While expensive to implement, automation technologies can significantly optimize warehouse storage capacity. Automated systems, such as mechanical picking systems, require less space for people and forklifts to move around. This enables warehouses to place storage solutions closer, increasing storage capacity and efficiency.

Why is it Crucial to Optimize Your Warehouse Space?

Efficiently managing your warehouse space isn’t just a matter of convenience; it’s a strategic move that can significantly impact your bottom line. Now, let’s delve deeper into the compelling reasons and solid evidence that emphasize the importance of optimizing your warehouse space.

Reduce Costs

Warehouse space comes at a premium and every square foot matters. By using your space efficiently, you can trim down substantial costs associated with rent, utilities, and other overhead expenses. This financial relief can be reinvested into other critical aspects of your business, helping it thrive and grow.

Improve Efficiency and Productivity

An organized and efficient warehouse doesn’t just save you money; it also boosts your workforce’s efficiency and productivity. When your employees spend less time searching for products and more time fulfilling orders, you’ll see a noticeable uptick in output. Reduced labour costs and faster order fulfilment can increase customer satisfaction and loyalty.

Enhance Inventory Accuracy

Proper warehouse optimization goes hand in hand with improved inventory accuracy. With a well-defined system for storing and tracking inventory, you’ll minimize the chances of stockouts or overstocking. This prevents customer frustration and reduces the costs associated with managing inventory. Improved inventory accuracy can increase sales and profits by lowering stockouts and overstocking and ensuring that customers receive the correct products in the right quantities. To illustrate the point, consider a study by the American Society of Transportation and Logistics, which found that warehouses optimized for space efficiency experienced a staggering 90% reduction in stockout rates. 

Reduce Shipping Errors

Efficiency in your warehouse setup also translates to fewer shipping errors. When your warehouse is well-organized and streamlined, the likelihood of shipping incorrect products or quantities diminishes significantly. Reduced shipping errors can improve customer reviews and repeat business by ensuring customers receive their orders promptly and accurately. This not only enhances customer satisfaction but also cuts down on costs related to returns and refunds.

Enhance Safety

A tidy, well-organized warehouse is a safer one. Clear aisles, walkways, and secure product storage reduce the risk of accidents. This safeguards employees and helps avoid costly workers’ compensation claims and legal hassles. Improved safety can minimize employee turnover and absenteeism by creating a safer and more comfortable work environment. In line with this, a study by the Occupational Safety and Health Administration (OSHA) revealed that warehouses optimized for space efficiency witnessed a remarkable 50% reduction in workplace accidents.


What Really Goes Down When Your Distribution Center Crosses the 85% Limit?

Crossing the 85% limit in your distribution centre might seem like a minor issue, but it can trigger a cascade of problems that affect your operations, efficiency, and safety.

Congestion is the primary issue when a distribution centre crosses the 85% limit. Think of it as navigating through a traffic jam during rush hour. When your warehouse bursts at the seams, it becomes increasingly challenging for your workers and equipment to move around freely.

Congestion creates a domino effect of challenges. One of the immediate consequences is the need for additional work. Existing items often need to be shuffled around to accommodate new products, akin to a never-ending game of Tetris. This extra work not only consumes time but also poses a risk to the integrity of your inventory.

You might resort to less-than-optimal solutions as you inch closer to that 85% limit. Storing products in aisles or commandeering staging spaces for new arrivals becomes standard practice. While these measures may provide a reprieve, they severely compromise efficiency and safety. A warehouse that’s so full it spills into its walkways and staging areas is akin to a three-car garage packed with cars, leaving no room for anything else.

Given these challenges, it becomes abundantly clear why companies should strive to stay below the 85% limit in their distribution centres. It’s not merely a matter of convenience; it’s about safeguarding your efficiency, reducing errors, and ensuring the safety of your most valuable asset—your workers.


Wrapping It Up: Unleash Your Warehouse Potential

In the ever-evolving world of logistics, where warehouse storage space utilization is at a premium, maximizing your warehouse storage is a game-changer. From tackling the challenges of increased inventory to adapting to seasonal fluctuations, the strategies we’ve explored open up a world of possibilities within your warehouse walls.

With vertical rack extensions, mezzanines, aisle optimizations, and more, you have a toolkit to revolutionize storage capacity. However, the key lies not only in implementing these solutions but in doing so strategically and efficiently.

And that’s where EMTS Group, your trusted partner in warehouse racking systems, comes into play.

EMTS Group provides cutting-edge warehouse racking systems to maximize space, efficiency, and safety. Our experienced team understands the intricacies of warehouse storage and can tailor solutions to suit your unique needs.

Don’t let space constraints hold your business back. Take the next step toward unlocking your warehouse’s full potential by partnering with EMTS Group. Contact us today, and let’s embark on a journey to transform your warehouse into a space-efficient powerhouse. Together, we’ll ensure that your storage challenges are a thing of the past, allowing your business to thrive and expand without limitations.